Archive for March, 2010

Caponata

March 30, 2010

This week’s book is my one and only Jamie Oliver, ‘Jamie’s Italy’. Well, actually it’s this week and next week’s book, as I’m off to Edinburgh for a wee break so it will be split across two weeks.

So here’s the first taste: caponata is a Sicilian aubergine stew with a sweet-sour taste. The sourness comes from the addition of vinegar, the sweetness is sometimes enhanced by raisins (although not in Jamie’s version). It’s simple and very good: the aubergines become deliciously soft and creamy, the almonds (sometimes pine nuts are used) add crunch, there are little sweet tomatoes and salty capers, and it all combines into something perfectly well-rounded. I had this for dinner with some couscous, followed up by these kale chips and a glass of sherry. Oh yeah, I know how to live, me.

Caponata  Serves 1 as a main course, 2 as a side

1 large aubergine
olive oil
1/2 tsp dried oregano
salt
1/2 onion (preferably red, but I only had brown), chopped
1 clove garlic, thinly sliced
2 tbsp herb vinegar (I used plain red wine vinegar)
3 tomatoes, roughly chopped (I used about 15 teeny plum tomatoes)
small handful parsley, stalks and leaves separated and each chopped
1 tbsp slivered toasted almonds

Chop the aubergine into chunks. Heat a couple of glugs of olive oil in a large pan over a high heat (there should be room for the aubergine in more or less one layer) and fry the aubergine chunks with the oregano and a grinding of salt for around 5 minutes, stirring occasionally, until the aubergine is golden. Add more oil as needed if it starts to catch on the bottom of the pan.

Add the onion, garlic and parsley stalks and fry for another couple of minutes. Pour in the vinegar and, when it has evaporated, add the tomatoes. Turn down the heat and simmer for 15 minutes. Serve sprinkled with the chopped parsley leaves and almonds.

Adapted from Jamie Oliver’s ‘Jamie’s Italy’.

Bread pudding

March 29, 2010

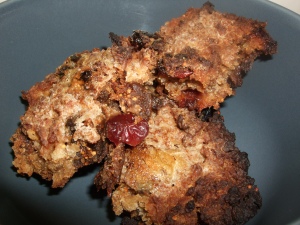
Not to be confused with bread and butter pudding, although it does contain bread and indeed butter. The main difference here is that, instead of the bread being baked in a custard, after being soaked in milk it’s mushed together and baked in a tray so that you get something altogether more solid and with a crusty sugary top.

You can serve this warm with custard, in which case it’s slightly softer but still dense, almost the consistency of a thick porridge or a really stodgy crumble, but when cool its density makes it quite cake-like, so any leftovers are good in slices at room-temperature with a cup of tea. I think you could easily get away with eating it for breakfast, even if the idea of cake for breakfast usually seems alarmingly hedonistic (it does to me).

Having eaten my first bread and butter pudding shockingly recently (custard was something I had textural issues with as a child and it’s taken me a while to get over) I like to think I’m making up for lost time in the world of sweetened stale bread. I now love bread and butter pudding, and although this is quite different, I like it a lot too.

Bread pudding  Serves 4 or more

8 slices of stale bread (I used sourdough)
300ml milk
200g dried fruit (I used sultanas, which are probably obligatory, plus cranberries and figs because they’re my favourite)
zest of 1 orange, grated
100g dark brown sugar
1 tsp mixed spice (whoops! forgot to put this in)
50g butter, melted
2 tbsp caster sugar

Cut the crusts off the bread and soak the slices in milk for 30 minutes. Drain and squeeze out any excess liquid (the recipe suggests putting the bread in a colander with something heavy on top for a few minutes). Heat the oven to 180c.

Move the bread to a bowl and mush it up with a fork until it breaks down into a soft, even consistency. Chop up any large pieces of dried fruit and mix all of the fruit into the bread mix with the orange zest, brown sugar, mixed spice and butter. Mix well.

Grease a 20cm x 20cm baking tray and scoop in the mixture. Roughly level the top and sprinkle with the caster sugar. Now, the recipe says to bake the pudding for an hour and a half. I trustingly left it in the oven while I got on with eating some beef stew and dumplings, but it ended up a bit charred around the edges and the raisins on top were cindered. It was fine, but quite chewy. I think check after 45 minutes and perhaps about an hour would do it. Leave in the tin for 5-10 minutes before cutting.

Adapted from Tom Norrington-Davies’ ‘Just Like Mother Used To Make’.

Sussex pie

March 26, 2010

Sussex pie – which I’ll admit I’d never heard of – is a variant of shepherd’s pie where the meat is bulked out with lentils, but this is a vegetarian all-lentil version. In our house we had shepherd’s pie on a regular basis to use up the lamb after a roast, as is traditional. And while I do enjoy good shepherd’s pie once in a while, in order to really spend a week eating all of the things I used to eat when I was younger, I would have had to have eaten a lot of meat, and that’s just not how I roll these days. So, a compromise. This is super cheap, filling, and also pretty good for you. It’s not the most photogenic meal, but when spring gives you thunder and lightning storms you can be glad you’ve got a pie in the oven.

A further bonus is that this pie uses a small amount of beer, so you will be obliged to finish the rest of the can/bottle, which gives you something to do while it’s in the oven.

Sussex pie  Serves 2

If you’re not vegetarian, feel free to add any leftover meat to the recipe.

1 tbsp olive oil or vegetable oil
1 onion, chopped
2 cloves garlic, chopped
2 sticks celery, finely sliced (too much, I’d say use 1 stick)
1 carrot, diced
1 sprig rosemary, finely chopped (I used a thyme sprig)
100g lentils (the basic green ones are good for this)
500ml vegetable stock
150ml beer (preferably bitter)
350g potatoes, peeled, boiled and mashed with a little milk and butter

Heat the oil in a large pan. If you have a casserole dish that goes in the oven and on the hob, use that. Gently fry the onion, garlic, celery, carrot and thyme or rosemary until soft, about 15 minutes. Add the lentils and stir to mix. Pour in the stock and beer and leave at a low simmer for about 30 minutes. The lentils should be done, but if they’re not, you can always add a little more water. Season.

Arrange the mashed potato over the lentil mixture, transferring everything to an oven-proof dish if you need to. It’s good to use a fork for this, so you get those little fork-tine marks that go all crusty. If your mashed potato is recently made and still hot, you can just put the whole lot under the grill to brown the potato and eat straight away, otherwise heat the oven fairly hot, about 220c, and put the pie in until the top turns brown – about 20 minutes.

From Tom Norrington-Davies’ ‘Just Like Mother Used To Make’.

Macaroni cheese

March 25, 2010

I was quite excited by the prospect of spending a week cooking from a book of traditional British childhood favourites. So many of the things in this book I remember well, the fond glow of nostalgia illuminating their former unremarkableness: corned beef hash (although it should not contain tomatoes!), liver and bacon, shepherd’s pie. I never eat these things anymore, and it suddenly occurred to me that I wanted to. Although there are a few things I never liked and still can’t stomach (gammon and cod and parsley sauce, bleugh). There are also a couple of glaring omissions, to my mind: where is the steak and kidney pie recipe? Chicken and mushroom pie, even? There are no pie recipes with pastry at all. And I would have liked a sausage casserole, but maybe that’s just me.

Macaroni cheese was the staple fallback meal of my childhood. Whenever my parents wanted to eat something that my brother and I would have shunned with our unsophisticated palates (or they just didn’t want to share with us) or time was short, macaroni cheese it would be. It was the only thing I really knew how to cook when I went to university, and I probably haven’t eaten it in ten years. Well, I’m not going to wait that long again. I felt comforted just looking at it coming out of the oven, all browned and crusty on top. With the first forkful I fell happily silent. Macaroni cheese is like the hot bath of foodstuffs – it’s impossible for it not to make you feel better.

The recipe below is for macaroni cheese as I remember it – no fussy additions, no breadcrumbs on top, just cheese sauce and pasta. As Norrington-Davies says, “Nothing should leap out at you except a clumsy, gooey richness.” Oh, there are a few tomatoes, which were never a feature when I was a child, but I thought I’d add them now I’m an adult and voluntarily eat vegetables. You could leave them out. Also, this is a mild-tasting sauce, not aggressively cheesy, which is right, I think, but you could of course use more cheese.

Macaroni cheese  Serves 2

200g macaroni
25g butter
25g plain flour
25g mature cheddar, grated
400ml whole milk
handful of cherry tomatoes (optional)
salt and pepper to taste

Preheat your oven to its highest setting, or if you have a grill in your oven turn that on high.

Put on a large pan of boiling, salted water and cook the macaroni according to packet instructions.

Meanwhile, melt the butter over a medium heat in a saucepan big enough to hold all the milk. When it has melted and is bubbling, stir in the flour. Leave to cook for a minute. Pour in a third of the milk and stir – you may need to switch to a whisk here to stop lumps forming. Then pour in the rest of the milk and cook for a few minutes, continuing to whisk, until the sauce thickens. Stir in two thirds of the cheese, season and turn off the heat. If the pasta is not ready yet, put a lid on the pan to keep the sauce warm.

When the pasta is cooked (it should be quite tender, not al dente), drain it and stir it through the sauce. Pile into a casserole dish and sprinkle with the rest of the cheese. Dot with the cherry tomatoes, if using, and give the top a final sprinkle of black pepper.

Put the macaroni cheese into the oven until the top is browned and crusty.

From Tom Norrington-Davies’ ‘Just Like Mother Used To Make’.

Mini banoffee pots

March 24, 2010

After making my millionaire’s shortbread, I had half a tin of condensed milk left over. I also had half a pot of cream in the fridge from a toffee sauce I’d made at the weekend to pour over sticky date cakes. There were bananas in the fruit bowl and there were biscuits in the cupboard. If I believed in a god, it would be the god of kitchen synchronicity, and he was clearly telling me something: child, go forth and make banoffee pie.

Now, generally I am not in favour of daintying up puddings into dining table desserts. The banoffee pie is resplendent in its tackiness, and that’s how it should stay. However, I only had the ingredients for half the quantity of a full-sized pie, and while I own much marginally useful kitchen equipment, I do not own a very small tart tin. Out of such adversity an idea was borne: why not construct the layers into ramekins, creating individual sized banoffees?

Actually, I was quite pleased with the result. They’re pretty cute, as mini things generally are, and are highly edible, rich and satisfying while feeling almost restrained – perfect for a mid-week pudding.

Mini banoffee pots  Makes about 4 ramekins, depending on the size of yours

For the base:
125g biscuits (I used a combination of ginger nuts and plain chocolate digestives, which worked fine)
25g butter

For the toffee:
65g butter
50g caster sugar
1 tbsp golden syrup
1/2 tin condensed milk (about 200g)

For the rest:
1 – 1/2 ripe bananas
125ml double cream
1/2 tsp honey
cocoa for dusting

Crush your biscuits into crumbs – I used the time-honoured and highly satisfying method of putting them in a plastic bag and bashing them with a rolling pin. Melt your butter and stir in the biscuit crumbs thoroughly. Press the biscuit mixture into the base of 4 ramekins or other individual sized pots, glasses etc.

For the toffee, melt the butter and sugar together over a gentle heat. When the sugar has dissolved, stir in the syrup and condensed milk. Bring to the boil and then reduce the heat and simmer, stirring constantly, until it turns the colour of toffee. This took about 10 minutes for me (I don’t know what I did wrong last time). Pour the toffee over the biscuit bases and leave to chill in the fridge for at least an hour.

When the toffee is set, slice the banana/s and layer them over the top. Whip the cream with the honey (apparently this makes it impossible to overwhip) until thick and spread roughly on top of the bananas. Finish with a sieving of cocoa powder.

Adapted from Tom Norrington-Davies’ ‘Just Like Mother Used To Make’.

Millionaire’s shortbread

March 24, 2010

This week’s book is ‘Just Like Mother Used To Make’ by Tom Norrington-Davies, and I don’t know what it was about the full page photo of Millionaire’s Shortbread on page 71, but it was calling to me. I had to make it. It’s not something I associate in any way with my mother or my childhood – jam tarts, peppermint creams and gingerbread men, yes, sticky layers of biscuit-toffee-chocolate, no. It might be a caramel thing. Ever since I discovered salted caramel and obssessed over the Ottolenghi caramel macadamia cheesecake until finally making it at Christmas, I’ve been a little bit crazy about caramel, and I could see a thick, amber layer of it gleaming sweetly at me from between two slabs of chocolate and shortbread.

Luckily, I had the perfect excuse in the form of a work birthday which I’d been tasked with making cakes for. The person in question had told me quite specifically that she liked fruit-based cakes best, but I brushed that little detail aside. Fruit, schmuit. I was almost certain that this would probably be her second choice, if she had one.

Not everything went exactly to plan – I thought I’d make them in advance on Sunday to give me plenty of time to, you know, check they tasted alright (don’t worry, this recipe makes a lot of shortbread). This is not a quick afternoon tea treat – there are several stages of cooling involved, and if you’re me, an extra trip to the shop when you overheat the chocolate and it goes grainy and you have to buy more. Although, if you do do this, know that you can bake the overheated chocolate into brownies and it will be fine and no-one will be any the wiser (um, unless they’re reading this). Also, my caramel took much longer than the 3 minutes specified in the recipe (I might have been a bit over-generous with the condensed milk in my excitement.)

Don’t let any of this put you off – I may have had to take my first bite after dinner, several hours after the caramel craving first hit, but it was worth the wait. Oh yeah, they went down pretty well at work too.

Millionaire shortbread  Fills a 20cm x 40cm tray

A couple of notes: first, I would advise cutting these into small squares. That way, you can have one and not feel too bad when you have another one later. My first wedge was a bit hefty and I almost struggled to finish it.

Secondly, the recipe asks for milk chocolate, which I thought would be a bit sickly, so I used Bourneville as a compromise. In retrospect, I can see milk chocolate working, so I think go with whatever chocolate you like best. Also, Tom felt that there was not enough chocolate. I think he’s wrong, but have duly noted his comments.

For the shortbread:
125g butter (salted is best)
50g caster sugar
175g plain flour

For the caramel:
125g butter
100g caster sugar
2 tbsp golden syrup
1/2 tin condensed milk (about 200g)

For the topping:
200g chocolate

Preheat the oven to 170c. Grease and line a 20 x 40cm baking tray with baking parchment.

Rub all of the shortbread ingredients together with your fingertips as if you were making crumble or pastry, but keep going until a dough starts to form. This might seem at first like it’s never going to happen, but it will. You’ll know you’re there when you can squeeze it into a ball and it holds together. Press it evenly into the base of the tray. Now, it may look as if it won’t cover the base of the tray, but it will honestly turn out quite thick, so just keep squidging it in. Bake it for about 20 minutes and then leave to cool – it should still be pale.

For the caramel, heat the butter and sugar in a saucepan. When the sugar has dissolved add the syrup and condensed milk. Bring the mixture to a boil, lower the heat and simmer for 3-4 minutes, stirring it constantly, until it thickens and turns a toffee colour. For me this took more like 30 minutes – just remember to keep stirring and don’t let it get too hot. It firms up a lot as it cools, so don’t worry if it seems a little runny. When it reaches the desired colour, pour it over the shortbread. Put the whole lot in the fridge to set for an hour.

Now for the chocolate. Norrington-Davies melts the chocolate with 4 tablespoons of water to make it easier to pour and so the topping is smooth and doesn’t set completely hard. Having done this, I realised that I prefer my chocolate toppings to be hard and shattery rather than soft and smooth, so I would leave out the water next time. Whichever path you take, break the chocolate into pieces and melt it either over a pan of hot water or in the microwave (carefully!) Pour it over the toffee and biscuit and smooth it out. Put it back in the fridge for at least an hour before you go at it with a knife.

It will last in the fridge for about a week.

Adapted from Tom Norrington-Davies’ ‘Just Like Mother Used To Make’.

Gujarati dal

March 15, 2010

I realise that I have already probably far exceeded the normal quota of bean recipes in the short time that this blog’s been running, but I haven’t actually written up a straightforward dal. And this seems to me like an oversight. Dal is so good – just a big plateful on its own is a fantastic cheap dinner, with chappatis or rice, sometimes hard-boiled eggs, sometimes just yoghurt – but it’s also one of the best side dishes ever. Knowing that I have a tupperware of dal tucked away in the fridge makes me look forward to mealtimes more. I actually made this recipe twice this week, and apparently it serves 6-8 people, so that’s a potential 16 helpings of dal in total. And I only live with one other person (and a cat, but he prefers fish-shaped biscuits).

I would normally fall back on Madhur Jaffrey for a recipe like this, and initially this dal seemed a little fussy with its giant list of ingredients (although it’s still essentially just boiling lentils and adding spices so it’s not exactly back-breaking work.)  Strangely, the first time I made it I used mung dal and thought it was okay, but the second time I was out of mung dal so I used toor dal and thought it was brilliant. I’m not sure if there was some magic scientific ratio of surface lentil size to spice absorption going on, or if it was just coincidence, but I thought I should pass it on.

Gujarati dal  Serves 6-8, or 3-4 if you eat it in the quantities I do

I halved the quantities of water asked for as I like my dal like I like my porridge: wallpaper paste thick. Add more if you prefer a soupy dal.

350g mung dal or toor dal
675ml water
1 tbsp sunflower oil or ghee
1/2 tsp mustard seeds
1/2 tsp turmeric
1/8 tsp hing (asafoetida)
1 tsp sea salt
1 1/2 tsp brown rice syrup
1 1/2 tsp lime or lemon juice
1 tsp coriander powder
1/2 tsp cinnamon
1/4 tsp curry powder
1 clove garlic, finely chopped

The book asks you to soak your mung for 2 hours, but I didn’t bother.

Heat the oil or ghee in a large saucepan and add the mustard seeds. When they start to pop, add the dal, water and all of the rest of the ingredients. Mix well and cook until the dal is soft and the liquid has reduced to the consistency you like – from around half an hour to an hour.

*Note: fine for all doshas.

Adapted from Amadea Morningstar and Urmila Desai’s ‘The Ayurvedic Cookbook’.

Sesame sweets

March 11, 2010

Yesterday afternoon I felt the need for something sweet, as I often do in the hours between lunch and late afternoon. I sort of wind down in that period and sometimes only the thought of something else nice to eat rouses me. Leafing through this week’s book, these sesame sweeties caught my attention – of course, I’m a sucker for anything with tahini and the deal was sealed with honey and coconut. They fall within the realm of a healthy snack, if you count using no refined sugar and two kinds of seeds, but they’re still fairly treat-like. Imagine what would happen if a Sesame Snap got in a fight with some fudge, and you might be close: sticky-sweet and dense and a little bit gritty and chewy, but not in a bad way.

Sesame sweets  Makes 7-10 delicious balls (their words!)

30g sesame seeds
3 tbsp honey
1 tbsp sunflower seeds
1 tbsp tahini
30g toasted wheat germ, or substitute more sunflower seeds
pinch of salt
30g shredded coconut, plus more for rolling
1/2 tsp vanilla extract

Grind the sunflower seeds into a rough powder in a blender. Combine with all the other ingredients into a bowl and mix into a stiff dough – this will be messy and sticky, but you should have a consistency you can form into balls. (Add more of the wet or dry ingredients as needed.) You may find it helps to wet your hands. Shape into walnut sized balls and roll in shredded coconut. I’ve been keeping mine in the fridge.

*Note: these are suitable for vata only.

From Amadea Morningstar and Urmila Desai’s ‘The Ayurvedic Cookbook’.

Ginger mung sprouts

March 10, 2010

I’m still very much in love with my ghee. It smells amazing – so much so that one of the first things I said to Tom when he walked through the door the other day was, “smell my ghee!” He thinks it smells like cake, and it does have a particularly entrancing caramelized sugar smell. I can’t wait to bake something with it.

But from butter to beansprouts we go (could this be the name of my first cookbook? From butter to beansprouts? On second thoughts, maybe it’s more of a sub-title). I’ve written before about sprouting your own mung beans, but I often find myself with more than I need and it pains me to see them wither having tended them so carefully over the course of days. The problem is, the slightly grassy fresh taste becomes a bit overwhelmingly roughage-like in large quantities.

I was vaguely aware that you could cook them, but never really considered it until I saw this recipe. Ayurveda is like the antithesis of the raw food movement – almost everything should be cooked; raw food is cooling in quality and can be difficult to digest (this is also held to be true in Traditional Chinese Medicine). This particular recipe also included ginger and almonds, two of my favourite ingredients. To make things even easier, my local farmer’s market was selling big packs of sprouted seeds, so I picked one up at the weekend and I was ready to go.

We had this with dal, rice and potatoes: a slightly odd contrast, but I liked it.

Ginger mung sprouts  Serves 4 as a side salad

1 400g bag of sprouted mung beans (or any other sprouted beans). About 50g dry beans will give you 400g when sprouted.
1 tbsp finely chopped ginger
1 tbsp tamari/soy sauce
1 tbsp sunflower oil (I didn’t have any so used British rapeseed oil)
1 tsp honey
handful of almonds (you could also used flaked almonds and/or toast the almonds beforehand)

Heat the oil in a large frying pan or wok. When hot, tip in the sprouts and ginger. Stir fry for 2 minutes over a medium-high heat. Pour over the soy sauce, mix well and add the almonds. Stir fry for a further minute. Take off the heat, stir through the honey, and serve.

*Note: this is fine for all doshas, though pitta should omit the honey.

From Amadea Morningstar and Urmila Desai’s ‘The Ayurvedic Cookbook’.

Ghee

March 8, 2010

This week, we enter the world of Ayurveda. Ayurveda is usually translated as ‘the science of life’ and it’s an ancient Indian system of wellbeing, around 5,000 years old, thought up by some ancient sages who went and sat in the mountains for a bit. I won’t delve into it too much here as it’s actually pretty complex and, you know, what’s Wikipedia for? Suffice to say, it’s connnected with yoga and food, two of my favourite things, and thus I like it.

In order to follow an Ayurvedic diet, you first have to find out what your dosha is. There are three doshas which correspond to three basic physical types – most people are a fairly equal mix of two doshas, but you might be predominantly one, or more rarely an equal mix of all three. There are many quizzes out there to help you find your dosha like this one or this one if you’re curious/like quizzes.

For the more cynical among you, I realise this may seem to veer dangerously close to new age hippy gubbins, but what do you expect from someone who last week brought a book all about eating according to the full moon? (It’s fantastic.) Anyway, if you’re still with me, I’m about to talk about butter.

Ayurveda thinks very highly of ghee: it’s thought to have healing qualitities and to build up strength in the body, including increasing digestive strength. It has a pacifying and grounding effect because its qualities (all food in ayurveda has qualities) are heavy, slow, oily, liquid, dense and soft.  It also, of course, tastes good, and unlike butter it will last almost indefinitely at room temperature (if you’ve done it right – I need to watch mine).

I was slightly nervous about making my first ghee, seeing as I’d been led to believe it was little short of a magical substance, and I don’t think I’ve ever even eaten it before. Turns out, it’s really very easy: all you do is melt some butter over a low heat so that the water evaporates and the milk solids rise to the top (clarifying the butter) and then strain it into a jar. It will be liquid and golden coloured at first, but as it cools it will set and turn a pale lemon yellow.

Ghee 

You want to use a good butter for this – good butter will make good ghee, as you might expect. It should be unsalted and preferably organic.

Melt as much butter as you plan to use in a pan over a low-medium heat. I started with one block, which gave me one small jar of ghee, but you might want to do two or three at a time if you’re planning on eating a lot of ghee.

The butter will start to bubble and fizzle – it should be quite noisy. Turn the heat down to low and continue to cook until the fizzling sound dies down and the middle of the liquid looks clear. There will be a white foamy substance on the top and you may be able to see debris on the bottom. This only took about 10 minutes for me, though some sources suggest cooking it for much longer. I read that while it’s cooking it smells like croissants, and it does. You can brown it slightly for extra flavour, but make sure it doesn’t burn (according to my book, it will start bubbling madly again if it’s burning).

Cool the liquid and strain it into a jar, either through a very fine-meshed sieve or a piece of muslin or cloth. That’s it – it’s ready to use as you would other cooking fats.

*Note: ghee is recommended for all doshas, though kaphas should use it in small amounts.

From Amadea Morningstar and Urmila Desai, ‘The Ayurvedic Cookbook: A Personalized Guide to Good Nutrition and Health’.

PS – my favourite Masterchef contestant got knocked out, so I guess it’s all down to Tim, the ‘children’s doctor’ (er, paediatrician?) now.